Mercedes CLS320 Boost Problem Successfully Resolved at Roade Main Garage
“I’ve taken it to three different places and no one can tell me what’s wrong.”
That was the message from Mr J when he first contacted Roade Main Garage in Northampton. His Mercedes CLS320 had been to several garages over a number of weeks, and each visit ended the same way: no answers, no fix, and a car that was still playing up.
The symptoms had been building gradually. The engine felt noticeably weaker than it used to, and there were times when the power would fall away completely during a journey without any warning at all. Mr J had started avoiding longer trips because he simply didn’t trust the car to get him there without trouble.
For any driver, that kind of uncertainty takes the enjoyment out of owning the car. A Mercedes CLS320 is built to deliver strong, consistent performance, and Mr J’s was doing the opposite.
When he brought the car to Roade Main Garage, our team was ready to take it on. We work with complex Mercedes faults regularly and have the dealer-level information and equipment needed to find what others miss.
It was time to get to the root of the problem and find out what was really going on with this Mercedes CLS320 boost problem.
First Steps To Diagnosing Mercedes Boost Loss
With Mr J’s Mercedes CLS320 now at Roade Main Garage in Northampton, we started where every good diagnosis should: with the driver. We asked Mr J to talk us through how the problem had developed, what the car did when it lost power, and whether he had noticed anything else unusual about the way the engine ran. Getting a detailed account of the symptoms before picking up any tools gives our technicians a framework for the testing that follows.
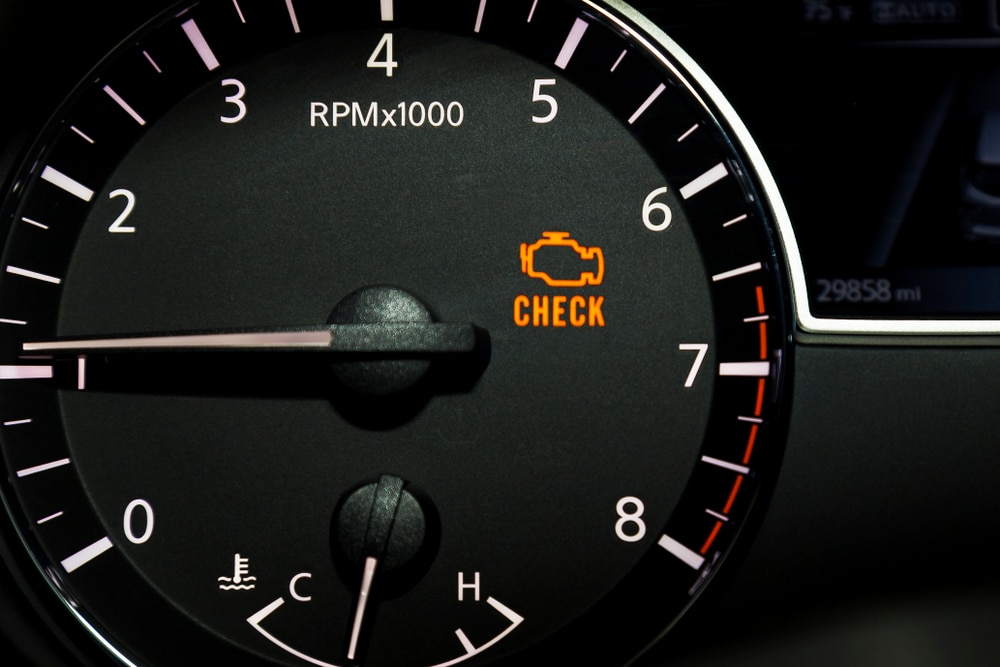
Once we had that picture, we connected our dealer-level diagnostic equipment to the vehicle. The scan returned six stored fault codes, each tied to a different part of the engine’s air control and emissions systems:
- P2626: DPF soot content too high The diesel particulate filter had recorded excessive soot levels, suggesting the system wasn’t regenerating as it should.
- P2530: Inlet port shutoff motor short to ground A fault with the swirl flap actuator, the part that controls airflow through the intake manifold to support engine efficiency and emissions control.
- P2527: EGR positioner short to ground The exhaust gas recirculation valve was not receiving the voltage it needed to regulate exhaust flow back into the engine.
- P2514: Crankcase ventilation line heater short to ground A heating element within the emissions system had lost its electrical feed.
- P2526: Charge pressure positioner short to ground The turbocharger’s control motor had lost power, directly affecting how the system controlled boost pressure.
- P2376: Throttle valve actuator voltage low The throttle valve, which helps regulate airflow and supports the emissions system, was returning a low voltage signal.
When this many voltage-related faults show up at the same time, it changes the way you approach the diagnosis. Rather than treating each code as a separate issue, our technicians recognised the pattern: multiple Mercedes fault codes P2626 P2530 P2527 and others, all pointing to lost electrical supply. The question now was whether they shared a common source, and that required structured, targeted testing to answer.
Uncovering the Source of the Mercedes CLS320 Boost Problem
The fault codes had told us which systems were affected, but not why they had all failed at once. For our technicians, that was the key question. Finding the answer meant moving beyond the scan results and investigating the electrical supply feeding each component.
Step 1: Checking the Power Supply
The first task was to find out whether the affected parts all drew power from the same source. Our technician used the Mercedes wiring diagram to trace the supply for each actuator: the turbocharger’s charge pressure positioner, the EGR valve, the swirl flap actuator, the throttle valve, and the crankcase ventilation line heater.
On this vehicle, these components share a fuse supply, located in the engine’s front control module.
- The fuse was inspected and found to be blown.
- With that fuse gone, every component on the circuit would have lost its voltage feed at the same time, which explained why so many faults had been logged together.
A new fuse was fitted to restore the circuit.
- Several fault codes cleared immediately, confirming that this stage of the diagnosis was heading in the right direction.
- Other codes returned shortly after, which told us there was still a fault on the circuit pulling more current than it should.
The electrical problem was confirmed as sitting somewhere on that shared circuit. The next step was to work through each connected component to find exactly where.
Step 2: Inspecting the Components on the Circuit
Each actuator and sensor connected to the fuse circuit was checked individually for damage or contamination.
The inspection uncovered two clear problems:
- Oil contamination around the swirl flap actuator The actuator controlling the intake manifold’s swirl flaps was heavily coated in oil. Oil contamination can cause internal electrical shorts or damage the motor inside the actuator.
- Damage to the turbocharger impeller The turbo’s compressor wheel showed clear signs of damage and wear. Oil from the failing turbo had migrated into the intake area, contaminating nearby components.
These two findings connected the dots. The oil-soaked actuator had most likely caused Fuse F44 to blow, while the damaged turbocharger explained the intermittent boost loss that had been affecting Mr J’s driving experience.
Step 3: Testing Circuit Stability
With the replacement fuse fitted and the fault pattern now clear, the circuit needed to be tested under load to confirm the findings held up.
- Current draw was measured across each actuator feed to verify no other component was shorting internally.
- With the swirl flap actuator disconnected, the fuse remained intact, confirming it as the main cause of the electrical fault.
- The turbocharger actuator, now receiving voltage again, was still underperforming because of the mechanical damage already found.
This testing confirmed a clear link between the faults and the triggers that had caused them.
Step 4: Planning the Repair
With both root causes now confirmed, we drew up a repair plan to restore the system. The shared fuse had already been replaced during the diagnostic evaluation to re-establish the affected circuit.
The remaining work addressed each confirmed fault:
- Replacing the damaged turbocharger to restore boost control and reliable engine output.
- Replacing the failed swirl flap actuator to eliminate the electrical fault and prevent the fuse from blowing again.
- Repairing the swirl flap mechanism using a new connecting rod and repair kit, avoiding the need for a full inlet manifold replacement.
- Cleaning the intake area to remove oil residue and protect the new components from contamination.
With the diagnostic evaluation complete, we were confident this plan addressed every root cause of the Mercedes CLS320 boost problem and would deliver a lasting result for Mr J.
Carrying Out the Mercedes Turbo Repair and Supporting Fixes
We walked Mr J through the full findings and outlined every repair that was needed. Once he was happy to proceed, our technicians began the work: a multi-stage repair covering both the mechanical and electrical faults identified during the diagnosis.
Here’s what was carried out:
- Turbocharger replacement A new OEM turbocharger was fitted, restoring the engine’s ability to control boost pressure and deliver consistent performance.
- Swirl flap actuator replacement The failed unit was replaced to clear the short circuit that had been blowing Fuse F44.
- Swirl flap mechanism repair The swirl flap assembly was repaired with a new connecting rod and repair kit. This restored correct flap movement while saving Mr J the expense of a complete inlet manifold replacement.
- Intake system clean Once the mechanical work was finished, the intake area was thoroughly cleaned to remove all remaining oil residue and protect the newly fitted components.
- Circuit stability check With Fuse F44 already replaced during the diagnosis, a final current-draw test confirmed the circuit was stable and every actuator was operating correctly.
Each repair stage was checked and verified before moving on to the next. This careful, sequential approach ensured the Mercedes CLS320 boost problem was fully resolved and the vehicle left the workshop running exactly as it should.
Post-Repair Testing: Confirming the Mercedes Engine Performance Fix
With the physical repairs complete, the car went through a full round of verification. Boost pressure was tested under load to confirm the new turbo was performing correctly, and a complete fault code re-scan confirmed all previous codes had cleared and none had returned. The engine was then run through a range of operating conditions to make sure the original symptoms were gone for good.
The results confirmed a successful Mercedes engine performance fix across every area tested.
Back to Full Strength for Mr J’s Mercedes
Mr J’s Mercedes CLS320 was transformed. The engine delivered smooth, responsive power again, and boost pressure remained steady. After weeks of uncertainty and failed attempts at other garages, the car was finally back to performing the way it was designed to.
Mr J was delighted. He was particularly impressed that Roade Main Garage had been able to pinpoint every fault and complete the full repair when other garages had not been able to take the job on. The decision to repair the swirl flap mechanism rather than replace the entire inlet manifold also meant his final bill was lower than expected, without any compromise on the quality of the work.
Courtesy car options were available to keep Mr J mobile while his Mercedes was with us, ensuring the repair process caused as little disruption to his day as possible.
Mercedes Performance Issues? Get Expert Support from Roade Main Garage
If your Mercedes is lacking power, hesitating under acceleration, or showing warning lights on the dashboard, it’s worth having the problem investigated sooner rather than later. These symptoms can signal underlying faults, the same type of complex, connected issues that caused Mr J’s Mercedes CLS320 boost problem.
Whether you’re in Northampton, Milton Keynes, or the surrounding area, our technicians are ready to help. We applied this same detailed process when diagnosing Mercedes boost loss in Mr J’s CLS320, where a thorough technical evaluation uncovered and resolved faults spanning the engine’s boost, emissions, and electrical systems.
Other benefits of choosing Roade Main Garage include:
- Courtesy car options available
- 12-month parts and labour guarantee
- Dealer-level knowledge without dealer prices
- Access to the latest Mercedes technical information and repair data
Join the {{review-count}} customers who rate us {{average-rating}} stars on Google. Call 01604 862262 today to book your appointment and restore your Mercedes to the performance it was built for.